Workflow Activiti6 eBook:
Workflow Activiti6 instructional video:
Introduction to Activiti and Spring Boot Project
Starting a new project requires setting up the development environment first. This involves selecting the appropriate technical stack, determining the framework versions, and ensuring compatibility between different components. Once these tasks are completed, the project needs to be configured, tested for proper functionality, and then shared with other team members. Unfortunately, even if the setup seems successful on one machine, others might still face issues. This initial phase often consumes a lot of time and effort, as every project typically requires some repetitive configuration work.
Inspired by tools like Ruby on Rails and Node.js, the JavaEE community sought a more streamlined approach to reduce the overhead of project setup. In response, Spring introduced Spring Boot, which simplifies the development process and allows developers to focus more on building business logic rather than managing infrastructure. With Spring Boot, many aspects such as system configuration, base code, dependency management, and even the application server are pre-configured. All you need is to include the right dependencies using a build tool like Maven or Gradle, and your project is ready to run without worrying about version conflicts.
Spring Boot supports both Maven and Gradle as build tools. Maven, widely used in the Java ecosystem, relies on the pom.xml file to define project configurations. Gradle, on the other hand, uses a Groovy-based DSL and offers good compatibility with tools like Maven and Ant. Since I prefer Maven, this book will use it as the primary build tool. At the time of writing, the latest stable version of Spring Boot was 1.5.4, and it required Maven 3.2 or higher.
Download and Install Maven
Apache Maven is a powerful tool that simplifies the build process. It stores all project configuration information in the pom.xml file, making it easier to manage large and complex projects through its inheritance model. One of Maven's most important features is dependency management. Instead of manually adding JARs, you simply declare the required dependencies in the pom.xml, and Maven automatically pulls in related libraries. This makes Maven an ideal companion for Spring Boot, allowing for faster and more efficient project setup.
The version of Maven used in this book is 3.5. You can download it from the official Maven website. After downloading and extracting the archive, add the bin directory to your system's environment variables, as shown in Figure 16-9.
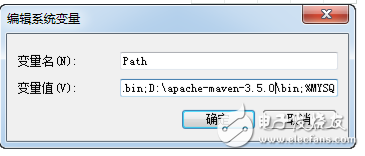
Figure 16-9 Modifying system environment variables
Once the environment variables are updated, open the command prompt and type "mvn -version" to verify the installation. The output should display the current Maven version, confirming that the setup was successful. Maven stores all downloaded JARs in a local repository, which by default is located at C:\Users\username\.m2\repository.
Earlier versions of Eclipse required additional plugins to support Maven, but recent versions come with built-in support. The version of Maven included in Eclipse is 3.2, but you can configure it to use the 3.5 version you installed.
Note: When importing a Maven project into Eclipse, make sure to select the "Existing Maven Project" option, as shown in Figure 16-10.
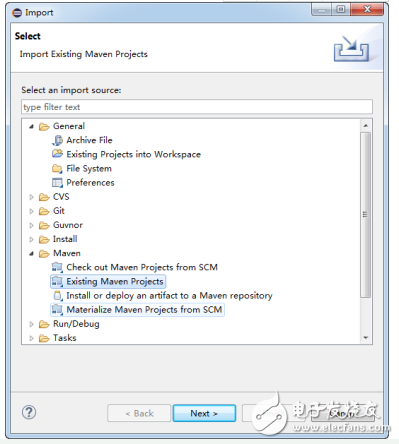
Figure 16-10 Importing a Maven project
Developing the First Web Application
In this example, we are using Spring Boot version 1.5.4. To start, create a new Maven project in Eclipse, following the steps shown in Figures 16-11 to 16-13.
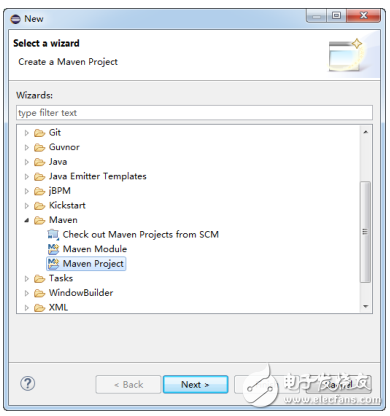
Figure 16-11 Creating a new Maven project
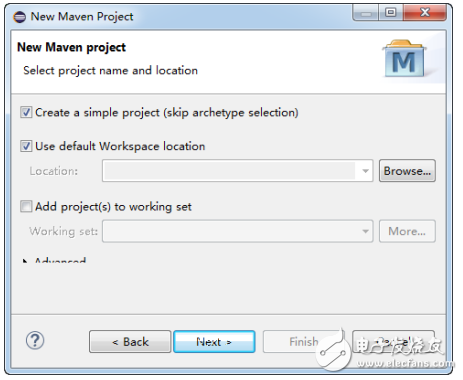
Figure 16-12 Creating a new Maven project
When creating the project, make sure to select "Create a simple project" to generate the most basic structure. This will help you get started quickly and avoid unnecessary complexity.
Harvester Accessories,Parts For Combine Harvester,Part For Combine Harvester,Spiral For Combine Harvester
Changzhou Youeryou Trading Co., Ltd. , https://www.farmpartssupplier.com