This project is about teaching you how to use MediaTek's LinkIt ONE development board to add voice output and distance testing to your favorite robot.

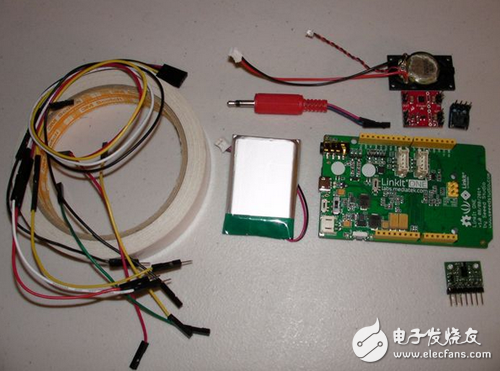
Step 1: Materials & Tools
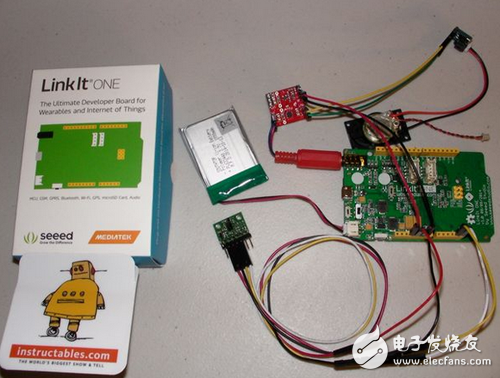
1. Linkit One development board with power supply
2. Mono audio amplifier
3.VL6180X distance sensor with voltage regulator
4. Audio connector: JST-PH2 pin surface mount right angle interface board, mono audio plug
Step 2: Increase voice output
Linkit One is equipped with an audio output via the audio jack on the board. Considering the size and power, it is recommended to use the notebook's miniature audio amplifier. Proceed as follows:
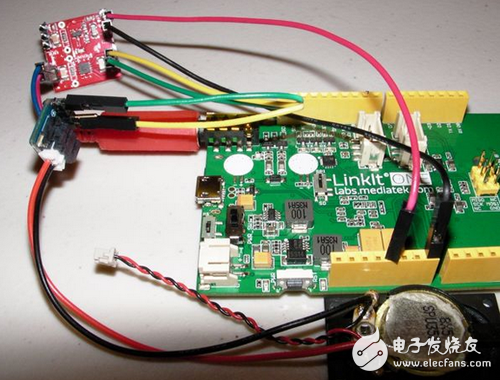
1. Use a jumper to connect the audio jack of the LinkIt ONE to the plug on the audio amplifier input pin.
2. Connect the 3.3V power supply to the GND of the LinkIt ONE audio amplifier to power it.
3. The microspeaker is connected to the output pin of the audio amplifier and a double-headed connector is soldered to the speaker, and a jst-ph 2-pin SMT right-angle breakout board is used between the two.
4. Search and download your favorite robot sound clip files online, and the online audio file format converter converts the files into the desired format.
5. The switch next to the USB interface of the LinkIt ONE is set to “MSâ€. Connect the LinkIt ONE to your computer with USB, and the LinkIt ONE will be displayed as a removable device. Then copy the sound clip file to LinkIt ONE and take an appropriate file name and file extension.
6. Disconnect the LinkIt ONE from the computer and set it back to “UART†via the switch next to the LinkIt ONE USB.
7. Connect LinkIt ONE to your computer and run Arduino's IDE, set up the tool - and set the appropriate port, open the file - Instance - "LAudio -" audio player.
8. Copy the first line in the invalid loop() function containing the LAudio.playFile command, change the correct file name, and add a delay (5000).
9. Compile and upload the code and the sound clip will play from the speaker.
Step 3: Add a sensor
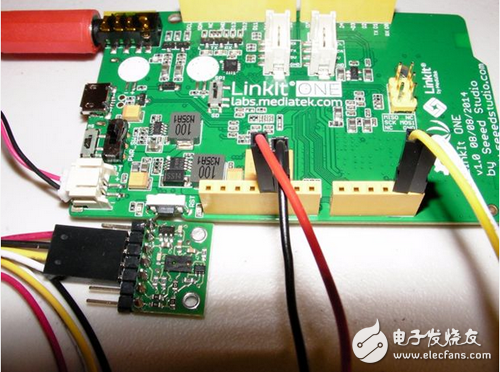
LinkIt ONE is equipped with a variety of general-purpose input / output ports. For convenient wiring, it is best to use the VL6180X distance sensor to drive the regulator through I2C. Proceed as follows:
1. Connect the LinkIt ONE to 5V and GND to VL6180X.
2. Connect SDA and SCL of LinkIt ONE to VL6180X.
3, VL6180X reading is a value of 10? 255, the maximum distance is 20cm.
4. Go to https://github.com/pololu/vl6180x-arduino/ to create the required libraries.
Step 4: Combine
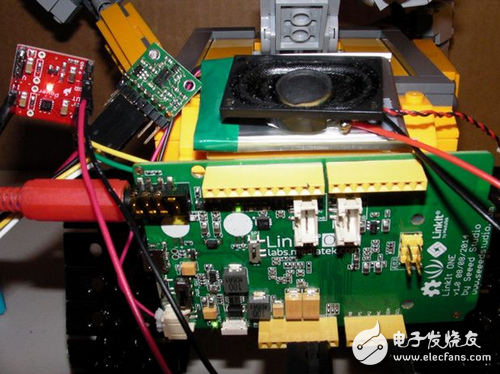
1. Download the attachment linkitone-walle.ino, compile and upload to LinkIt ONE.
2. Connect the battery to the LinkIt ONE.
3. Attach all to your robot.
4. Open LinkIt One.
5. Add more I2C sensors, audio clips and more to the show, there will be more fun!
Electronic enthusiasts "Robot Technology Special Issue", more quality content, download now

Tin Zinc Alloy Wire is a kind of electronic welding material speciallized for metal spraying of the end face of metalized film capacitor.The capacitors have been widely used in high-speed rail,automobiles,new energy and aerospace fields.
Application Fields: Metal spraying material is a kind of electronic welding material specialized for metal spraying of the end face of metalized film capacitor.
Tin Zinc Alloy Wire
Tin Zinc Alloy Wire,Zinc Alloy Wire,Tin Zinc Alloy Soldering Wire,Alloy Wire
Shaoxing Tianlong Tin Materials Co.,Ltd. , https://www.tianlongspray.com